
1860's Bonnet, modeled by Olive


I decided to re-do the cover for the benefit of some of the Civil War museum gift shops, so this new sample, worn by me, is from my own line of Civil War reproduction fabrics for Benartix--called The Americana Collection. The pattern comes with five sizes--Adult, Child, Infant, 18" Doll (could fit a premie), and a smaller doll, such as the doll panel I created for Benartex Fabrics.
Making this bonnet doesn't have any real difficult steps, but there are many steps, and it will take a day to complete this. Hopefully, this tutorial will enable you to fly through all the instructions and give you a bonnet that you will cherish--and wear in your own garden!

Begin by stitching the ruffle pieces together (only for the larger sizes). I use a flat-felled seam so it doesn't have raw edges on the underside. To make this seam, place the pieces of fabric wrong sides together, with the raw edge of the top fabric 1/4" away from the raw edge of the bottom fabric. Stitch 1/4" away from the top raw edge, as shown.

You will then fold the bottom raw edge over the top raw edge and press in place.

Press the seam flat and top-stitch close to the folded edge.
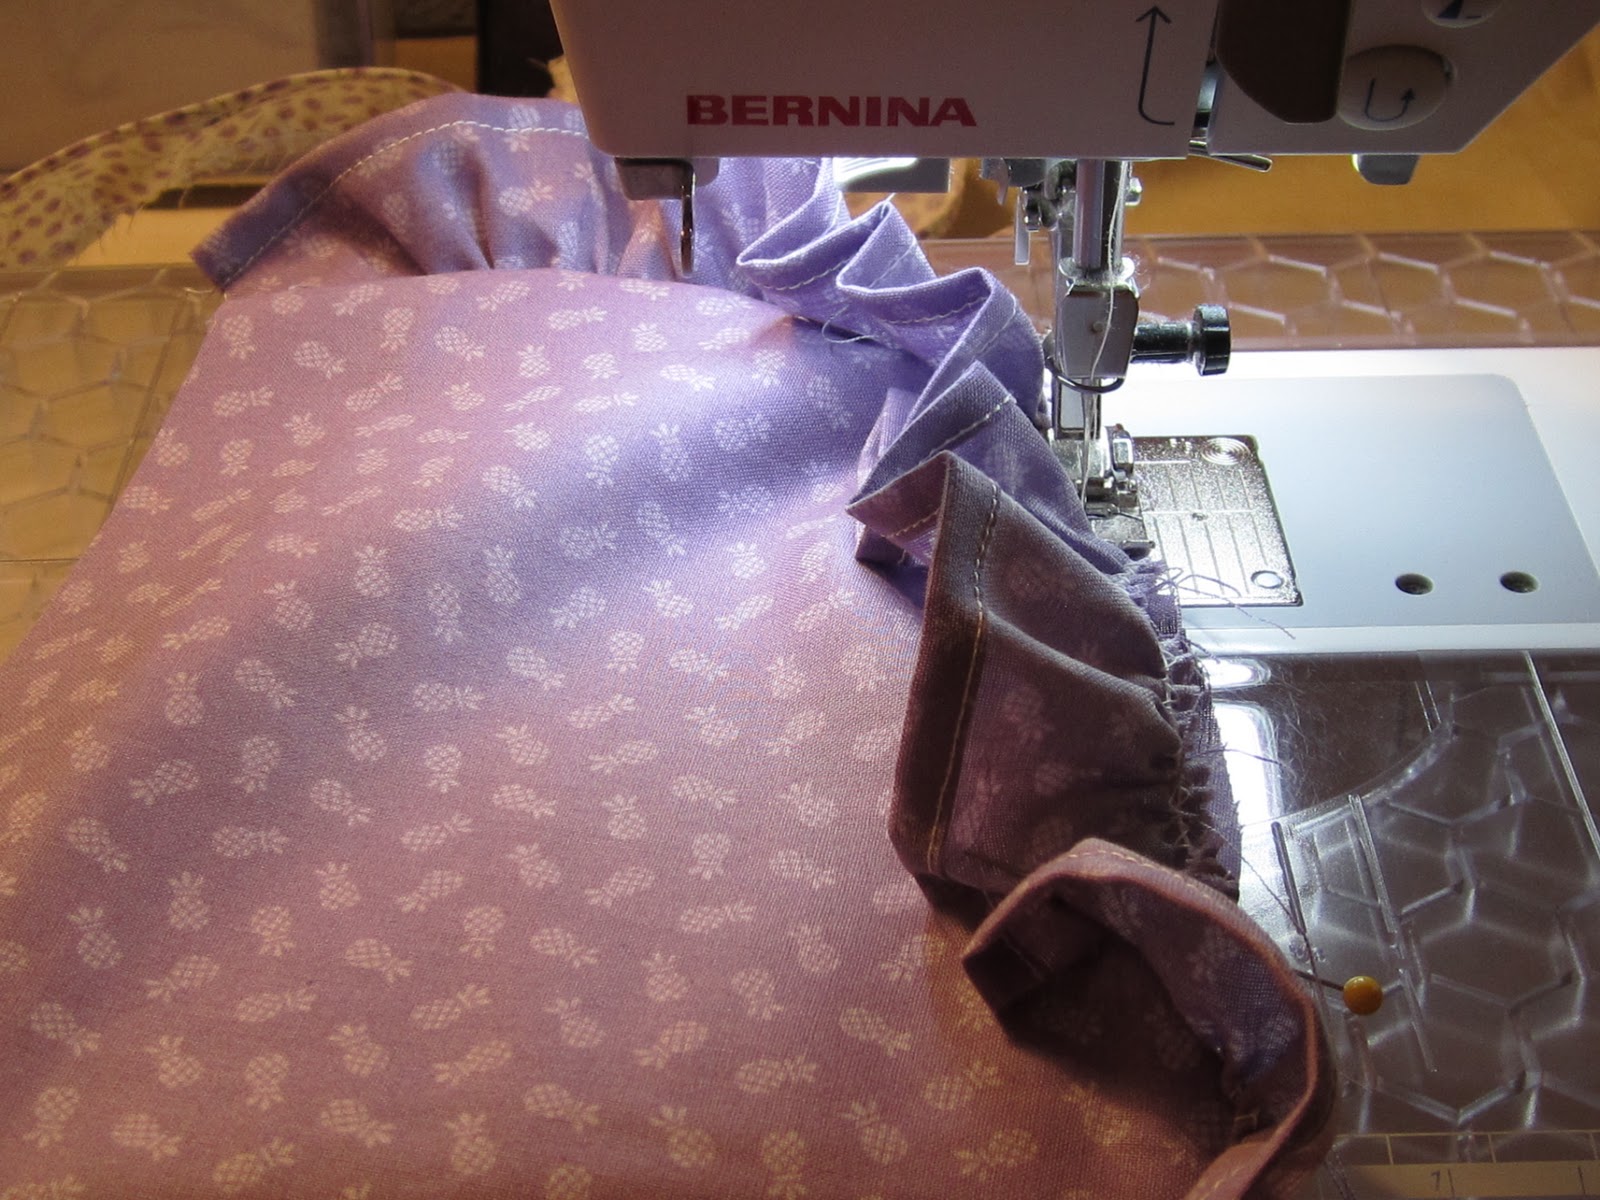
Next, you will press under a scant 1/4" along the long edge of the ruffle.

Fold under once more and stitch close to the edge.

Gather the raw edge of the ruffle by pulling out thread from your machine the length of the ruffle (do not cut the thread). Place the thread about 1/8" from the raw edge of the ruffle and zig-zag over the top of the thread.
Set your machine for zig-zag....


Now, with the threads pulled out, you are ready to begin.

Center the threads under the presser foot and begin stitching.

Make sure the threads are 'enclosed' by the zig-zag stitch. Stitch all the way across the raw edge of the ruffle, then gather the fabric by pulling the two threads, until the ruffle fits around the top (curved) edge of the brim.

Stitch the ruffle to the edge of the brim, then pin the muslin interfacing and the lining of the bonnet to the ruffled brim. Pin them so the brim and lining are right sides together, with the muslin on the outside of the lining.

Turn the brim so you can see the original stitching, and stitch on top of that first stitching.


Turn the brim right side out and press it.

Top stitch next to the curved edge, then across the width of the bonnet, following the directions in the pattern (Step 7).

You will now start on the back lining piece of the bonnet. This is stitched into the bonnet to keep your head from going back into the 'puffy' part of the bonnet. You will begin by hemming the side edges, so press under 1/4" along each side edge of the back lining.

Fold under and stitch each side.

You will now make a casing, and to begin, you need to press under 1/4" along the long edge of the back lining.

Fold under 1/2" (wider than normal) to form the casing. Stitch in place.

After the hem is stitched in place on the casing, you will need to baste it to the bonnet brim. Please make sure you baste it to the LINING side of the brim (that will be the side that shows the wrong side of the ruffle). Stitch in place, 1/4" from the raw edges.

Hem the bottom edge of the bonnet back by pressing under a scant 1/4".

Press under the edge again and stitch--then press it!

Now, this next part is very important! You are going to stitch a casing across the lower part of the WRONG side of the bonnet back, and to determine the placement, you need to place the brim by the bonnet back, like this:

You will make a pencil mark on the wrong side of the bonnet back that corresponds to the top of the ruffle (on the brim). Repeat for the opposite side of the bonnet back, then draw a line across, like this:

The penciled line will be the stitching guide for the lower edge of the casing. To make the casing, you need to press under 1/4" along each of the long sides of the casing.

Place the casing onto the back of the bonnet (wrong side), matching the lower edge of the casing to the penciled mark. Stitch in place.

Now, you will cut 1 1/2"-wide strips of scrap fabric to insert into the casing to gather it. Check the instructions, Step 16, to see the length you will gather the bonnet back. You will need to sew enough inserts to gather the bonnet back and to gather the back lining, and that amount varies, but I would have at least 28" sewn for the largest size (and that will give you more than you need, but it helps to have a little extra to work with).
First, press in edges of strips toward the middle.

Fold in half and stitch close to edge.

Insert into back lining casing by attaching a small safety pin to the end of the sewn strip.

Gather the bonnet back to the size specified in the instructions, for example, the adult size will be gathered to 7" (Step 16). As you pull the strip through, leave about 1/2" protruding from the entry side, and top-stitch across several times so the strip will be stationary.

When the gathering is completed, top-stitch the other side to keep the gathers in place.

Gather the bonnet back between the two dots, using the same method as other gathered areas of the bonnet.


Pin the brim to the bonnet back, right sides together, and stitch together.


Once the bonnet back and brim are stitched together, zig-zag the lower edges--up to the gathered section of the bonnet back.

Use the extra length of gathering strips to gather the back lining through the casing. When it is gathered to look like the photograph, tie a square knot and trim the ends.


To hem the ties. press under a scant 1/4" around two long sides of the tie, then one of the ends.

Fold under edges and stitch.
Pleat the raw end of the tie, and fold 1/4" under so the right sides of the tie are together (opposite of what you usually do). Pin the folded end inside the bonnet brim, placing it where it is comfortable to tie around your neck. The adult size is about 2 1/4" away from the back lining; the child's size is about 1 3/4"; the smallest doll bonnet is about 1"... so you get the idea.

Now, your 1860's bonnet is ready to hang on a shelf, so you can grab it when you want to keep your complexion from getting sunburned. Happy gardening!

Note: This is the bonnet shown before ties were sewn inside!